Category : Miniatures

Overlap

Sometimes we call them “repurposed” — the fact is, it’s a rerun.

I ended the old year and started the new with a medical setback, so I’m calling in my chips and RePosting a LadyKiller blog from last year/aka last week. Forgive me if you’re bored.

I’m a glass-half-empty-and-it’s-draining-fast kind of girl, so I can’t speak to making lemonade out of lemons. BUT I can tell you how one of my hobbies turns trash into art.

In the world of miniatures, there’s a spectrum of artists. On one end is Frances Lee, famous for her recreations of crime scenes, which she used to instruct police officers on procedure. Pick up The Nutshell Studies of Unexplained Death for a fascinating collection of her scenes, made from scratch, down to knitting tiny stockings for a clothes line.

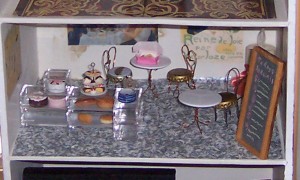
On the other end is, well, me. My particular style of kludging scenes together is called “Found Objects” – taking the cap of a toothpaste tube and turning it into a lampshade, or using a toothpick for a log in a fireplace. Here’s a sample. The scene is a café, set up on a bookcase shelf. The white tables are  the inserts from PIZZA boxes to keep the cover from the food; the chairs are wire and soda bottle caps; the cases for pastry are small plastic boxes sold as organizers.

Bistro in Museum cafe

Each of my Miniature Mysteries (by Margaret Grace) contain tips at the end for found objects. Here are a couple of lemon-to-lemonade samples for your dollhouse or mini scene:

1) The lemon:  small springs found in a used up ballpoint pen.

The lemonade: Attach one to a screen door for a realistic look or place it on the floor of a child’s room as a “slinky.”

2) The lemon: a worn-out woolen winter glove.

The lemonade: a knit cap, made by cutting the tip from a finger of the glove.   Turn up the brim and toss on the floor!

You get the point!

If you think this is cheating, remember the wisdom of Carl Sagan:

If you wish to make an apple pie from scratch, you must first invent the universe.

See? Why bother?

Spooky Dessert

Halloween, and everything is spooky.

As a matter of fact, for mystery readers and writers, every day has potential for being spooky and it’s hard to be MORE spooky on Halloween.

How about these eerie looking cookies for generating frightful eeeuwws from your guests?

eeuuw!

The Recipe

I cheated (which I usually do at cooking) and started with a roll of cookie dough that’s in the refrigerator section of the supermarket. I chose peanut butter because it seemed closest to “skin” color.

Step 1. Instead of cutting the dough as directed, lop off pieces and shape into a long skinny “fingers.” The first time I tried this I made the shape too wide and got very, very fat fingers. [You’d think I’d know about thermal expansion.] A roll about the diameter of a pencil works well.

Step 2. Place the fingers on an ungreased cookie sheet. Stick a slivered almond slice into one end of the finger—lo, a fingernail!

Step 3. Squeeze red frosting (another cheat, using a readymade tube) on the opposite end from the nail. If you lay the fingers out facing the same way, you can just run a line of frosting down the sheet, capturing all the fingers with one swoop.

Step 4. Bake according to package directions and SERVE.

Long May It Wave

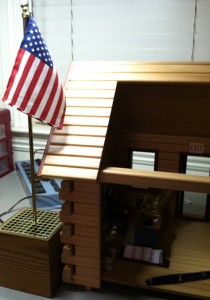
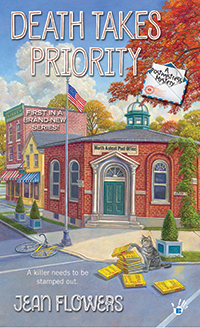
I’m a big fan of the American flag. One of my favorite reminders is a present from my sister-in-law, years ago: a flag attached to an electric base. Switch it on and the flag waves!  Here it’s pictured next to the miniature post office I’ve been working on in connection with my new series: the Post Office Mysteries.

THE FLAG is at the very beginning of the first book in the series:

<><><>

On most days, I love my job. Who else gets to start the day by raising the American flag outside her office? Military personnel, I suppose, and maybe law enforcement officers. But they have to suit up with a belt full of tools and weapons, while I just shrug into a comfortable blue shirt and a striped scarf with its special, ready-made, sewn-in knot that sits low and soft on my neck. Not exactly clubbing clothes, but then there aren’t any clubs in North Ashcot, Massachusetts, and, anyway, it’s Monday and I’m here to work.

Postmaster Cassie Miller reporting for duty.

<><><

Wishing everyone a great 4th of July weekend!

MANAGING A CRAFTS ADDICTION

This blog is Chris Verstraete’s fault. I guested (new v.i.) on her site last month. I presented some tips on how to use up crafts supplies that accumulate and seem to take over your crafts corner, no matter how big or small.

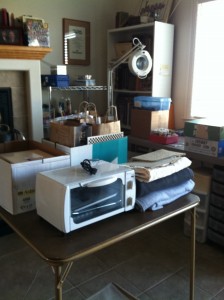
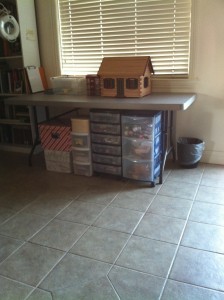
To save face, I had to practice what I preached there. I started with Tip #1: DONATE! This week, I invited two women who run the wonderful Good Sam Showcase of Miniatures to come and carry off supplies for their children’s programs and white elephant sales. They drove away with the back of their SUV packed to the limit, including the toaster oven, for crafts clay only. (Thanks Barb and Phyllis!) Here’s the before and after proof.

Before the purge

1. DONATE. (More ways to donate.) Every year I donate a furnished dollhouse to a local school. I work on it through the summer and have it ready for their holiday raffle. Instead of furnishing the house completely, I include a bag of materials—odds and ends of wood, plastic, fabric, paint—with ideas on how the lucky winner of the house can make her own accessories.

After (this will last ~2 days)

I also prepare small scenes for auctions. Recently a mini scene brought in one nearly $300 at a silent auction to benefit a library literacy program. Donating not only helps a worthy cause, but it allows me to Buy More Stuff. (I warned you this might not help trim down your inventory!)

2. Scrapbooking supplies—not just for scrapbooks. I promised myself that I wouldn’t buy a greeting card until I had no more paper left in my house. I’m not very good at those professional-looking cards some of my friends make—the ones with several layers of paper, cutouts, brads, and stamped messages placed exactly in the center where they belong. But expertise is not necessary to make a personalized card by simply arranging a collage of stickers or stamp images on a piece of stiff paper. Use the kitchen-themed stickers for a friend who’s a good cook, flag stickers for a vet, or cut the shape of a boat from a scrap for the friend who sails. The large scrapbooking sheets that have a design on them can be folded twice, into card size and often used as is. Most people prefer something hand-made, even if it looks a little like a day care effort.

3. Fabric scraps. Besides dressing up and giving texture to greeting cards, fabric can be used as wrapping paper and to make small items like pouches for travel and luggage tags. (For these, just fold and press the fabric into a sturdy block; stick around the edges, leaving an opening to insert a business card. At the tip of the opening, thread yarn to make a loop for attaching to luggage.)

4. Out of the box. Sometimes it’s fun to pick a piece from a crafts drawer at random and make something from it. Today, I found a partially used page of red glittery sticker letters. I took the H, B, and S, and made a Happy Birthday gift tag for Steve using an odd piece of gold cardstock.

I think of my crafts “corner” as my playground—and everyone knows playgrounds are usually overstocked and a bit messy, and always a lot of fun. I hope you have fun playing with your crafts!

More miniature scenes are on display in the gallery.

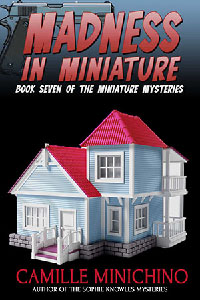
Add a tip in a comment and win a chance for a copy of the newest Miniature Mystery, MADNESS IN MINIATURE by Margaret Grace!